
How do I create a single Dial List?
A single Dial List contains one or more calls that are assigned to one or more agents. The assigned agents might not own the Salesforce records (contact, account, lead, and so on) to which the calls relate.
Dial Lists created using a filter are either static or dynamic. For information about dynamic Dial Lists, see Dynamic Dial Lists.
To create a single Dial List using the Create New Dial List page, perform the following steps:
Open a Create New Dial List page. You can open a new Create New Dial List page in the following ways:
- From the Dial Lists tab. Click the Dial Lists tab and click New or New Dial List depending on which view is open. Create New Dial List appears.
From the Create New... menu. On the left side of the Salesforce window, click Create New... and then click Dial List. Create New Dial List appears.
On the Create New Dial List page, provide the following values:
Field Description List Name Type a suitable name for the Dial List that will make the list identifiable later. The value is not unique. List type Select one of the types in the list, such as Contacts or Leads. The list type determines the type of customers you can select for your Dial List.
Phone Field Select a phone number field. This field's contents appear in the Primary Phone field in call records created in association with this Dial List. Connect uses this phone number if available. Alternate Phone (optional) Select a phone number field. This field's contents appear in the Secondary Phone field in call records created in association with this Dial List. Connect uses this phone number if the Primary Phone field is empty.
Multiple Lists To create a single Dial List for multiple agents to use, clear the check box. (To create Dial Lists for multiple individual agents, select the Multiple Lists check box. For information about creating multiple Dial Lists, see Creating multiple individual Dial Lists for agents.) A call record is not created if the Primary Phone and Secondary Phone fields are both empty.The following fields are only available if the features are enabled for your account.For information about permissible call times, see Permissible call times for Dial Lists.
Provide values in the following fields to specify permissible call times:
Field Description Time Zone
The time zone which both Start Time and End Time are expressed in.
Start Time The start of the Dial List's permissible call time, that is, the time from which the Dial List is active. Type the start time in Coordinated Universal Time (UTC).
If both Start Time and End Time are 00:00, when the Dial List is activated the list is always active.End Time The end of the Dial List's permissible call time, that is, the time at which the Dial List is no longer active. Type the end time in Coordinated Universal Time (UTC).
If both Start Time and End Time are 00:00, when the Dial List is activated the list is always active.For information about cross-list prioritization, see Cross-list prioritization.
To change the priority, modify the value in the Priority field:
Field Description Priority The priority of the Dial List. Provide a value from 0 to 999. The lower the value, the greater the priority of the list. Lists with no value have the lowest priority.
Click Next. The next page appears.
Define the filtering and ordering settings for your Dial List.
If you are creating a Dial List of Campaign Member type, see the Creating a Dial List of Campaign Member type section later in this page.In the Filter By Fields section, you must define at least one filter that is used to select records.
You can filter by fields on the object you're using or used to create the Dial List and on related objects. The steps here describe using fields on the object used or being used to create the Dial List. For information about using related objects in filtering Dial Lists, see the Using related object types in filtering and ordering Dial Lists section later in this page.
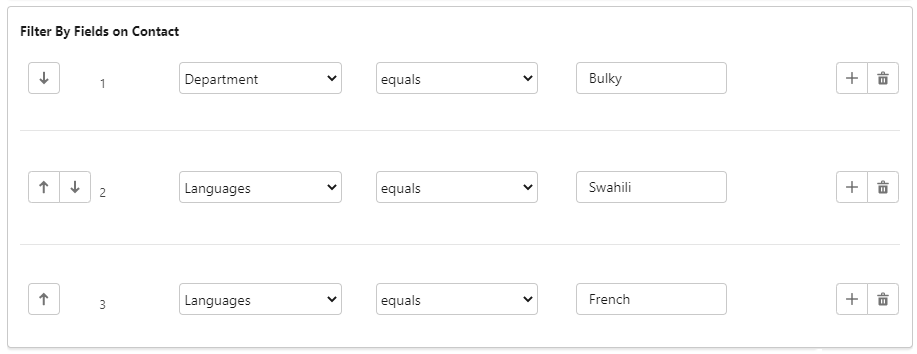
- In the first field, select the record detail used for the first filter — the available details include fields on the object you're using or used to create the Dial List.
- In the second field, select the comparison operator used.
- In the third field, type the value to which the customer value is compared.
If you want to include additional filters, click the plus (+) icon alongside one of the filters you have added. Another row of fields appears below that filter. Repeat this step for all filters you want to define. You can add up to 20 filters but best practice is to keep the number of filters to a minimum. You can reorder the filters as required using the up (↑) and down (↓) arrow icons to the left of the filters.
Optional. In the Filter Logic section, you can override the filter logic used.

The default logic operator is AND—the filters you define in the Create New Filter section are joined. To override the default logic, refer to the filters by their numbers, for example, ((1 AND 3) OR (2 AND 5)) OR (4 AND 2).The NOT operator is not supported.
If you want to filter record detail records by date — for example, the date the records were created, birth date of customers, date of last contact with customers — you must specify the date as an exact date or using a date literal. For further information about specifying dates, see Date Formats and Date Literals in Salesforce help.
Using the following example:
Filter 1 Last Name equals Jones Filter 2 Last Activity less than 2014-06-19 Filter 3 Department equals Sales the default filter logic returns customers whose details match all of the criteria.
A filter logic of '((1 OR 2) AND 3)' returns the following customers:
Customers whose last name is Jones OR whose record was last modified before 19th June 2014
AND
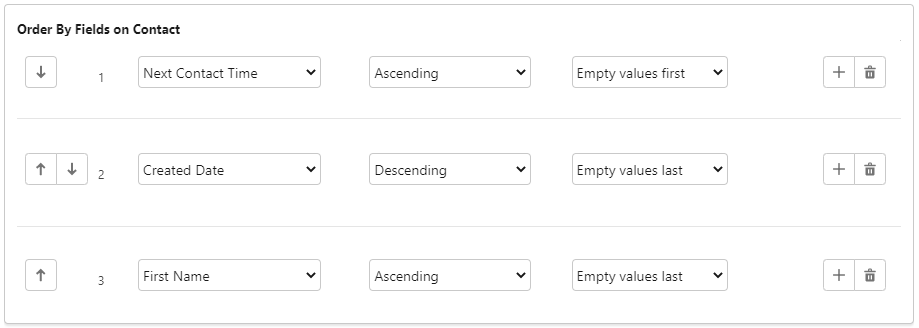
who are in the Sales departmentOptional. In the Order By Fields section, define the order in which you want filter results to appear in the Dial List. We recommend that you do this. Defining the order determines the priority in which the records are contacted, with the first field in the list having the highest priority.
You can order by fields on the object you're using or used to create the Dial List and on related objects. The steps here describe using fields on the object used or being used to create the Dial List. For information about using related objects in ordering Dial Lists, see the Using related object types in filtering and ordering Dial Lists section later in this page.
- In the first field, select the customer detail used for the first sort option — the available details include fields on the object you're using or used to create the Dial List.
- In the second field, select the sort order.
- In the third field, select whether empty values should appear first or last in the Dial List.
Click Generate List.

Your new Dial List appears.
Before you or any assigned agents can use your Dial List, you must complete the following tasks: You can also edit filters (where applicable), change the priority of a Dial List, set permissible call times, and edit custom fields. For information about these tasks, see Editing a Dial List.