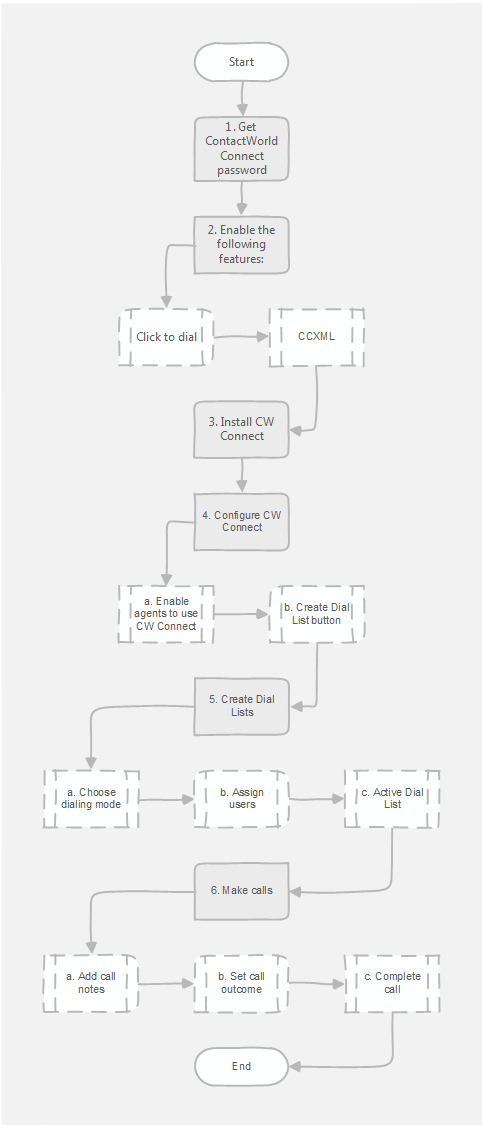
The following diagram illustrates the process that you must follow to set up Connect to make calls.
Notes:
- Request Connect password from NewVoiceMedia.
- Request that NewVoiceMedia enable the following features:
- Click to dial
- CCXML
Install the latest version of Connect. For information on installing Connect, see Installing Connect.
- Configure Connect:
- Enable agents to use Connect. For information on enabling agents to use Connect, see Enabling an agent to use Connect.
- Create a Create Dial List button and add the button to required list views. For information on creating and adding a button, see Setting up a Create Dial List button.
- Add home page or console components. For information about adding components, see Adding Connect to a non-console app in Salesforce Classic and Adding Connect to a console app in Salesforce Classic.
- Add Dial list info action to page layouts. For information about adding the Dial list info action, see Adding Dial List description to page layout.
- Create Dial Lists. For information on creating Dial Lists, see Creating a Dial List. Edit the Dial Lists you create, ensuring that you include the following changes:
- Choose the dialing mode.
- Assign users.
- Activate the Dial List.
- Use Connect to make calls:
- Update Salesforce user record with call notes. For information on adding call notes, see Adding notes during a call in Connect.
- Set call outcome. For information on setting the call outcome, see Setting disposition codes in Connect.
- Complete the call. For information on completing the call, see Completing a call.

