Accessing and navigating Insights products
- Helen Griffith
The Insights products share some common user interface elements, particularly regarding accessing and navigating Team Monitoring, Real-time Analytics, and Historical Analytics.
| In this page |
|---|
Accessing Insights products
To access Team Monitoring, Real-time Analytics, and Historical Analytics, perform the following steps:
- Log in to the VCC Admin Portal. For information about logging in to the VCC Admin Portal, see Logging in to the Vonage Contact Center Admin Portal.
- If you are the supervisor of multiple accounts, select the account that you want to access one of the Insights products for, and click Select.
From the Vonage Contact Center homepage, go to Team Monitoring, Real-time Analytics, or Historical Analytics (within Insights). Your chosen product appears.
Navigating Insights products
When you have accessed your chosen Insights product — Team Monitoring, Real-time Analytics, or Historical Analytics — if your account has no dashboards available or you do not have access to any existing dashboards, a blank page appears. If enabled for your account, a single button to create a new dashboard is available.
If you have dashboards available to you in your account available dashboards appear, by default, in a table. If you have previously chosen to view dashboards by tiles, available dashboards are arranged in tiles. You can switch between table and tile views using the table and tile icons. Your choice is stored in your browser's local storage and will be reapplied next time. Clearing your browser's local storage removes your display mode choice.

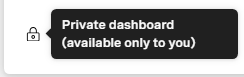
In Team Monitoring and Real-time Analytics, your favorite dashboards appear at the top of the page; others are sorted alphabetically. Private dashboards — available only to you — are indicated by a padlock icon.
Managing Insights dashboards
From a list of Insights dashboards, depending on your permissions, you can perform some or all the following tasks:
Open an existing dashboard
To open a dashboard, click anywhere in the dashboard's tile or row. The dashboard opens. For information about using the dashboard in your chosen product, see Using Team Monitoring, Using Real-time Analytics, or Using Historical Analytics.Create a new dashboard
If enabled for your account, you can create a new dashboard. For information about creating dashboards in your chosen product, see Creating and editing dashboards in Team Monitoring, the How do I create a new Real-time Analytics dashboard? section in Using Real-time Analytics, or the Creating a new Historical Analytics dashboard section in Using Historical Analytics.Mark a dashboard as a favorite
To mark a dashboard as a favorite, hover over the dashboard tile or row and click the star icon that appears. The star icon changes to a solid yellow color and the dashboard moves immediately to the top of the page, sorted alphabetically along with any other favorites. A non-favorited dashboard contains a star with a grey outline.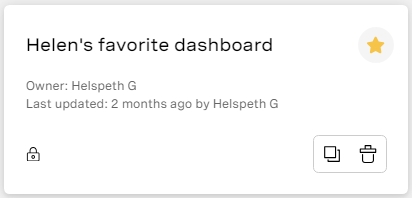

Search and filter dashboards
You can search for specific dashboards by name or owner. To search for a specific dashboard, start typing part of the required dashboard's name in the Search by dashboard name or owner field. The list of dashboards is filtered as you type.
In Team Monitoring and Real-time Analytics, you can filter the list of dashboards to show only dashboards you own or your favorite dashboards, or you can show all dashboards. Select My dashboards or Favorite dashboards respectively to filter dashboards.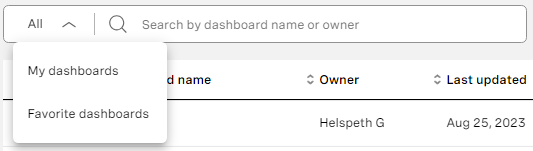
In Historical Analytics, you can filter to show only default or custom dashboards, or all dashboards.Clone or copy a dashboard
If enabled for your account, you can clone or copy an existing dashboard. To clone or copy a dashboard, hover over the dashboard tile or row and click the copy icon that appears.
Provide a new name for the dashboard and continue.Delete a dashboard
If enabled for your account, you can delete a dashboard. To delete a dashboard, hover over the dashboard tile or row and click the delete icon that appears.
Click Delete or Confirm to continue or click Cancel the deletion.
For general assistance, please contact Customer Support.
For help using this documentation, please send an email to docs_feedback@vonage.com. We're happy to hear from you. Your contribution helps everyone at Vonage! Please include the name of the page in your email.