
Using the Routing Simulator
- Helen Griffith
- Dawid Wietrzykowski (Unlicensed)
Using the Routing Simulator you can explore different routing scenarios without having to place calls, send emails, or even set up agents.
The simulator simulates scenarios with either one agent and two interactions (interaction selection) or two agents and one interaction (agent selection) and scores each interaction-agent or agent-interaction match.
Mandatory and unexpired skills
The simulator scores each interaction-agent or agent-interaction match using the values you enter. If you add values for an agent or agents without all mandatory and unexpired skills, the simulator will consider them and score each interaction-agent or agent-interaction match accordingly.
In practice, VCC never considers routing an interaction to an agent without mandatory or unexpired skills.
Interaction selection
You can give the agent skills, and can set the following attributes on the interactions:
- Skills. You can tag the interactions with mandatory, expiring, and optional skills in the same way as you can using a Skills Tagger applet.
- Waiting time at start (s). You can set the time that the interaction has been waiting to be assigned to an agent.
- SLA percentage and SLA time (s). You can set the percentage of interactions that must be answered within the specified time.
- Personal queue timeout (agent logged in) (s). You can set the length of time for which the interaction must be in an agent's personal queue and can only be answered by the specified agent.
The simulator displays the score for each interaction-agent match at one second intervals.
How do I use the Routing Simulator to determine which interaction VCC will assign to an agent?
To use the Routing Simulator, perform the following steps:
To access the Routing Simulator, log in to the VCC Admin Portal and change the URL after CallCentre to /useradmin/routersimulator.
For example, in the North American (NAM) region, the URL would be https://nam.newvoicemedia.com/CallCentre/useradmin/routersimulator. Routing Simulator appears.

Click the Interaction selection tab and provide the following information:
Section Field Description Agent Skills The name and level of each skill that your agent has.
- Separate a skill name and its level with a colon.
- Separate multiple skills with commas.
For example, type 'Support:1, Sales:10' for an agent with level 1 in Support and level 10 in Sales.
Case-sensitive
Skill names are case-sensitive.Interaction x Skills The name of each skill that the interaction requires and its necessity level.
- Separate a skill name and its necessity level with a colon.
- Add ':0' after the skill name for an optional skill.
- Add ':x' after the skill name for expiring skills where x is the number of seconds for which the skill is mandatory.
- Separate multiple skills with commas.
For example, type 'Support, English:0, Sales:15' where Support is mandatory, English is optional, and Sales is mandatory for 15 seconds.
Case-sensitive
Skill names are case-sensitive.Waiting time at start (s) The number of seconds that the interaction has been waiting for an agent. Interaction has SLA Determines whether the interaction has an SLA or not. If you do not click Interaction has SLA, the interaction has no target SLA and the simulator ignores the SLA percentage and SLA time (s) fields. SLA percentage The percentage of interactions that must be answered within the time you specify in the SLA time (s) field. SLA time (s) The number of seconds in which the percentage of interactions that you specify in the SLA percentage field must be answered. Interaction has personal queue for agent Determines whether the interaction should be routed to an agent's personal queue or not. If you do not click Interaction has personal queue for agent, the interaction does not require a specific agent and the simulator ignores the Personal queue timeout (agent logged in) (s) field. Personal queue timeout (agent logged in) (s) The number of seconds for which the interaction must remain in an agent's personal queue and can only be assigned to that specific agent. - Click Simulate!.
The following information appears:
| Section | Description |
|---|---|
| Scenario Description | A textual description of the scenario you are simulating. +++ Agent 1
Skills:
0: Support (Level: 1)
1: Sales (Level: 10)
### Interaction 1
Interaction type: Phone
Seconds waiting: 0
SLA: None
Skills:
0: Support (always)
2: English (optional)
1: Sales (expires after 15 seconds)
### Interaction 2
Interaction type: Phone
Seconds waiting: 0
SLA: None
Skills:
2: English (expires after 8 seconds)
1: Sales (always)
|
| Selected Interaction | The interaction that is assigned to the agent—the interaction with the highest score.  |
| Scoring Data | This section consists of a line graph and a table showing the scores for the interactions at each second interval. The interaction with the highest score is assigned to the agent.
|

Agent selection
You can set optimum load and maximum idle time for the account; currently, you must use default capacity settings for each interaction type. You can set required skills and a type for the interaction, and can set the following attributes for the agents:
- Skills. You can assign skills to each agent and the level they have in those skills.
- Workload. You can set each agent's current workload, that is, the capacity already consumed by assigned interactions.
- Idle for (s). You can set the length of time that each agent has been available but not working on any interactions.
The simulator displays the score for each agent-interaction match at one second intervals.
How do I use the Routing Simulator to determine which agent VCC will select to handle an interaction?
To use the Routing Simulator, perform the following steps:
To access the Routing Simulator, log in to the VCC Admin Portal and change the URL after CallCentre to /useradmin/routersimulator.
For example, in the North American (NAM) region, the URL would be https://nam.newvoicemedia.com/CallCentre/useradmin/routersimulator. Routing Simulator appears.
Click the Agent selection tab and provide the following information:
Section Field Description Account Settings Optimum load The ideal capacity that your agents' assigned interactions should consume. Optimum load max idle time (s) The maximum time that your agents, while able to handle interactions, can be idle. Agent x Skills The name and level of each skill that your agent has.
- Separate a skill name and its level with a colon.
- Separate multiple skills with commas.
For example, type 'Support:1, Sales:10' for an agent with level 1 in Support and level 10 in Sales.
Case-sensitive
Skill names are case-sensitive.Workload The agent's currently used capacity. Idle for (s) The number of seconds that the agent has been idle. Interaction Skills The name of each skill that the interaction requires and its necessity level.
- Separate a skill name and its necessity level with a colon.
- Add ':0' after the skill name for an optional skill.
- Add ':x' after the skill name for expiring skills where x is the number of seconds for which the skill is mandatory.
- Separate multiple skills with commas.
For example, type 'Support, English:0, Sales:15' where Support is mandatory, English is optional, and Sales is mandatory for 15 seconds.
Case-sensitive
Skill names are case-sensitive.Interaction Type Whether the interaction is a phone call, chat or email. The type determines the capacity the interaction requires based on the default listed in Account Settings.
- Phone: 100
- Chat: 33
- Email: 25
- Click Simulate!.
The following information appears:
| Section | Description |
|---|---|
| Scenario Description | A textual description of the scenario you are simulating. For example +++ Agent 1
Workload: 20
Idle for (s): 0
Skills:
0: Support (Level: 1)
1: Sales (Level: 10)
+++ Agent 2
Workload: 0
Idle for (s): 6
Skills:
0: Support (Level: 5)
1: Sales (Level: 5)
### Interaction 1
Interaction type: Email
Skills:
0: Support (always)
2: English (optional)
1: Sales (expires after 15 seconds)
$$$ Account settings
Optimum load: 65
Optimum load max idle time: 10
|
| Selected Agent | The agent that the interaction is assigned to—the agent with the highest score.
|
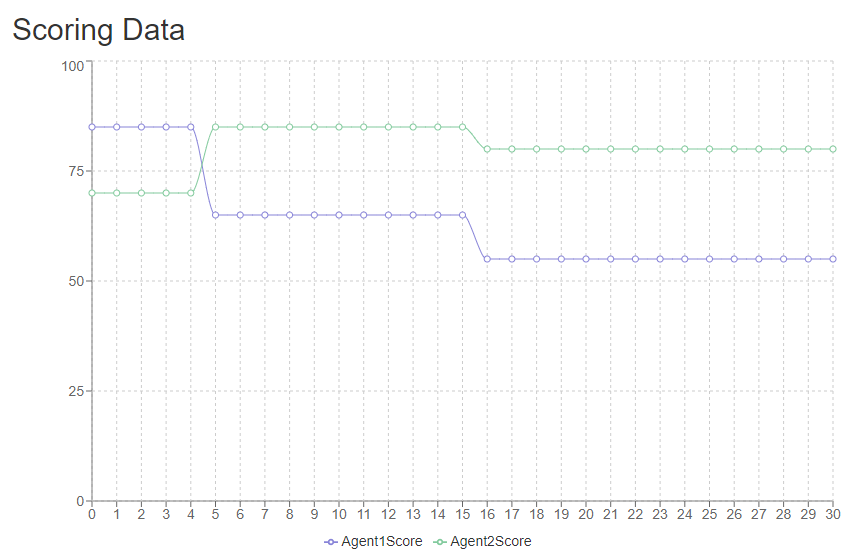
| Scoring Data | This section consists of a line graph and a table showing the scores for the agents at each second interval. The interaction is assigned to the agent with the highest score.
|

For general assistance, please contact Customer Support.
For help using this documentation, please send an email to docs_feedback@vonage.com. We're happy to hear from you. Your contribution helps everyone at Vonage! Please include the name of the page in your email.